Whether this is your first time with FPP or you're a seasoned pro, I'd like to share some of my top tips for perfect piecing and accurate blocks every time. I hope you'll find them useful and that it sets you on the path to FPP confidence!
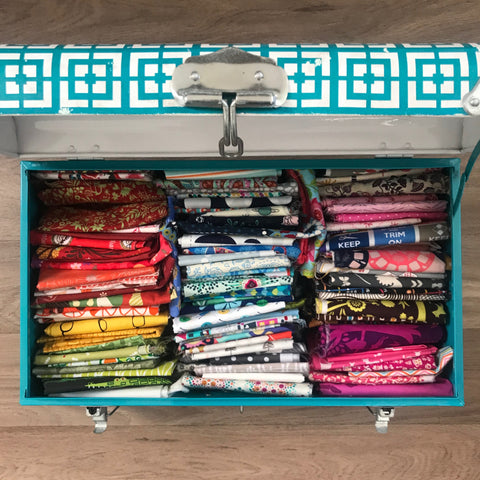
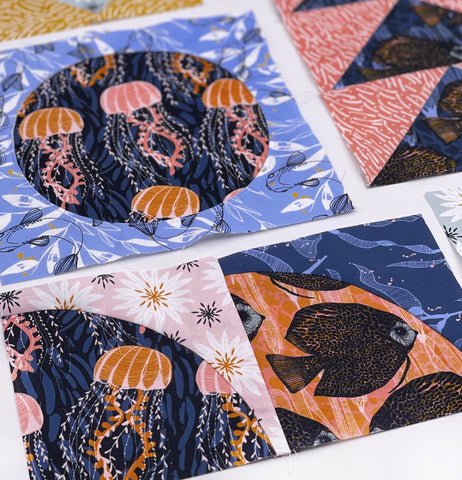
One of the joys of quilting is putting together colours and fabrics. Curating fabrics can bring us such joy. With FPP it's important to remember that because you're working on the underside of your paper pattern, everything is back to front. And given that this method is a little counter intuitive anyway, it can be very easy to get your colour/fabric placement in a muddle. So I recommend roughly colouring in each section of your block in the colour that you want it to be, to help ensure that you stitch the right fabric piece in the correct place. Trust me, unpicking small stitches through paper is not that much fun! So this really helps avoid that.
Yes I did say EPP glue, even though we are FPP-ing! A little touch of glue is great to get you started on each section. Take your first A1, B1, C1 etc. section and lightly spread a small amount of glue onto the paper of that section in the middle. You just need enough to hold the fabric in place before you add your second piece. Subsequent sections won't need glue as they will be stitched to the paper. I found the glue to be much easier than pinning to the paper as with glue everything lays nice and flat under the needle of your machine. It may also be that your first section is very small, so a pin wouldn't work anyway. I've FPP'ed 1 ½ inch blocks (yes, you read that correctly!) and the glue was perfect for this as a pin would have been far too big anyway.
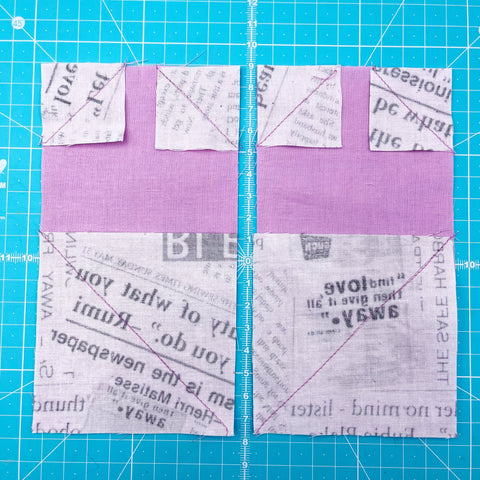
If you're serious about FPP and see more of it in your future, I definitely recommend purchasing a light box. These days they are wafer thin, very light, portable, charged via a USB cable and super useful. I find an A4 sized one suits all my needs. Not just for FPP but for tracing quilt patterns, embroidery...in fact my children enjoy it for tracing intricate pictures too!
But back to FPP. Place the fabric behind the pattern right side down on the light box to check that your fabric is bigger than the section you're covering and with more than a 1/4” seam all around. If you're fussing cutting a motif, this also allows you to ensure that it's central, or where you want it to be. But if a light box is not for you, there's always the good old fashioned holding it up to a window trick!
In my opinion, an add-a-quarter ruler is an absolute must have for FPP. It's a ruler with a 1/4” ridge on it, allowing you to slot the ruler over the fabric and the paper, enabling you to cut a perfect 1/4” seam every time. The advantage is that the ruler fits in snuggly over the fabric and paper, so it doesn't slip and you have full control when you cut. I have the shorter ruler shown here, but they are available in longer lengths. I get on great with this size though as most of my edges aren't longer than this and if they are I can just move my ruler along. The shorter ruler also makes it easier to trim short sections, as it's easier to manipulate.
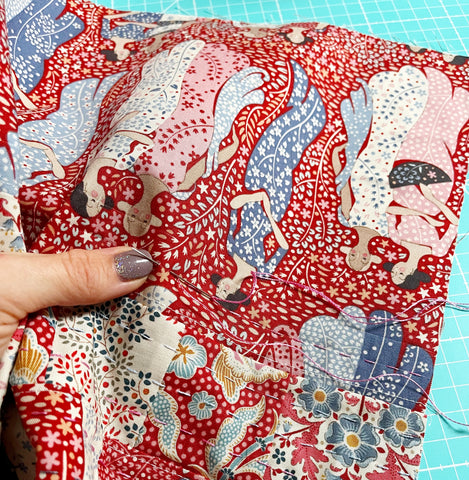
A postcard or indeed any bit of thin card is very useful for FPP. You do want it to be of about postcard thickness though. (Personally I like to use a postcard, preferably of somewhere I've visited, as then I can reminisce about happy times spent there.) Put the postcard against the fold line and fold the paper back over the line and towards the postcard. This will ensure that your line is straight a crisp every time. It's such a simple technique but so effective.
First of all, make sure your rotary cutter is sharp! We are all guilty of using a blade that's seen better days, but it really does make so much difference when you're using a fresh blade. Also, make sure you're using the right size cutter/blade for the job. If you're piecing smaller blocks it is much easier to use a smaller rotary cutter to give you more control and accuracy. I'm thinking back to my 1 ½ inch blocks – a small rotary cutter was definitely needed then!
So That's the tools and equipment I recommend to give you the best possible results.
Other things I recommend are:
Using a short stitch length to more easily tear away the papers
Stitching forwards and backwards at the beginning and ends to reinforce the seams
Making sure you press each time between sections
Leave the papers in as long as possible. When you join the sections together, just tear away at the edge where you're stitching. Only remove the papers once your ready to baste and quilt your quilt
If necessary, use tweezers to help you remove papers that are caught within the stitches.
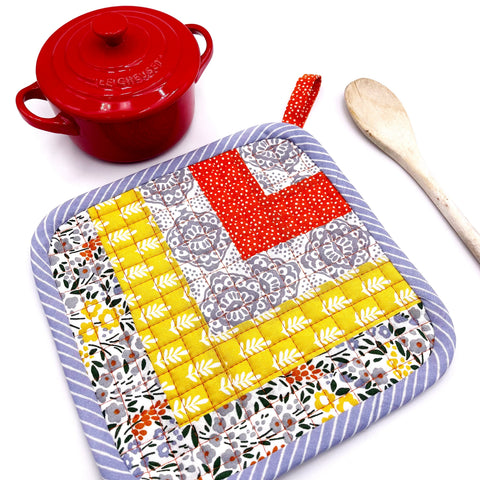
I know you're going to love my Up and Away Baby Quilt pattern and also my Sweet Heart of Mine Baby Quilt pattern! Both are a great introduction of FPP!
If you do make my foundation paper pieced patterns or quilt blocks, do share on socials and tag me @sarahashfordstudio I always love to see!
Be sure to subscribe to my newsletter to hear my latest news, receive free patterns and updates :-)
I'm having so much fun with a style I've dubbed 'Structure and Improv.' The concept behind it is that you take a series of different sized traditional quilt blocks, and then you piece them all together using improv piecing. You can read all about the 'structure' part of this mini quilt in Part 1 of this blog post here.
Here they are, my traditional quilt blocks, patiently waiting to be stitched together.
And now I've finally got around to piecing them all together using improv patchwork. The first thing I did was lay out my traditional quilt blocks roughly in a formation that made a rectangular mini quilt shape. Then I started adding small sections to each block, so that it became the size it needed to be to join it's neighbour.
Sometimes I would piece together squares and then join them to the main block.
Other times I would just add a quilt strip to make one block the right side to join the one next to it.
Then I joined the sections together, adding as I went, to make everything fit together.
Cut, sew, trim, repeat.
And slowly, all the blocks were joined together, into an eclectic and unique quilt top!
I'm so thrilled with how this mini quilt has turned out. It appeals to me because I love making traditional quilt blocks, but I also love the freedom of improv piecing. It really is the best of both worlds.
What do you think? I hope this method has inspired you to give it a try!
]]>
If you're anything like me, even if you've just started on your sewing and quilting journey, you already have more fabric and notions than you know what to do with, and storing them in an organised way can be somewhat of a challenge.
Well I just love a stylish but practical storage solution, so I thought I'd share some of my top tips for how I organise my sewing space!
I love the idea of having my own personal quilting shop, so I have wrapped all of my fabrics 1/2m or more around comic book boards, and organised them in colour order. Like a bookshelf, they are easy to see and it gives my shelf that 'shop' feel! The comic book boards are acid free, so I can be sure that they won't damage my fabric. You can get them here.
My only word of advice would be if you're storing fabrics in this way, make sure they aren't in direct sunlight, as the sun may fade the bit of fabric that is exposed.
I probably have more fat quarters than any other size of fabric. I love to store them in my trusty trolley, again in colour order so that I can easily see and access them. You can purchase a similar one here.
I also love metal trunks for storing my fat quarters, as these are stylish, durable and it's easy to access the fabric. You can get similar ones here.
For my fat quarter collections that I want to keep altogether, I store them in a draw, or if they are on display I put a ribbon around them so they look pretty!
There is much debate about how to best store scraps and I have tried different approaches over the years. I have decided scrap bins/buckets work best, and I just tip them on the table and audition them when I'm working on a scrap project. It makes a big mess, but I always tidy up afterwards! You can shop here for a similar one to mine.
Another hobby of mine is collecting quilting books. I just love them! Recently I have organised them in rainbow order, which I find very pleasing.
I find storage boxes are a great way to keep things all together, and most importantly, they need to be labelled so that I can quickly find what I need. They also look smart, and I always know where everything is. Stackable crates are also another great option for storage, and they are collapsible too.
Whether you have your own sewing room or just the kitchen table, being organised will always make your sewing easier and more pleasurable. Do also check out my Amazon page, for more storage solutions and all my favourite quilting related things.
I hope these ideas give you some inspiration to get organised!
One of my favourite patterns of all time is called the Wee Braw Bag, and it's designed by my friend Laura of @sweetcinnamonroses. I have made many Wee Braw Bags over the years, including for my mum, who loves to use it to put all her bits and bobs in when she's going on holiday.
This year, disaster struck. My mum went on holiday to Greece and her suitcase, containing the Wee Braw Bag got lost! 3 months later and it still had not turned up, so she asked me to make her another one for Christmas. Luckily, I had been sent some gorgeous fabric by British designer Sally Kelly @sallykellyfabric and I couldn't wait to put them to good use.
These are the Atlantis and Celeste collection by Windham Fabrics and will be available in 2023. I knew they would be perfect for a Wee Braw Bag, and so I set about choosing which prints to use, and paired them with a lovely plum coloured braid for the drawstring.
I love making this bag because it comes together really quickly, the instructions are easy to follow and there are colour photos to guide you as well. Laura has a great way of explaining things, even to beginners.
I finished making the Wee Braw Bag in an evening, and it's now ready to gift to my mum on Christmas day. You would never believe it though, just 3 days after I finished it, my mum's suitcase turned up on her doorstep! So now she has two Wee Braw Bags. But you can never have too many in my opinion, so I shall fill it with treats, ready to gift to her.
Here are some versions I've made in different fabrics previously.
Aren't they cute?!
You can get the Wee Braw Bag from Laura's Etsy Shop here. Do check out her other awesome patterns too, they are such fun to make!
]]>
When fabric designer Lisa Dolson gifted me some of her Ocean Adventures fabric for Paintbrush Studio Fabrics, I immediately knew that I wanted to have a play with improv patchwork. With so many lovely prints to incorporate, I wanted to be free to experiment and see how the creative flow took me.
With Christmas fast approaching, I couldn't resist making a festive version of my Sofa Sewing Station Pattern, and I wanted to tell you all about it.
Have you ever been sat on the sofa stitching, and found that you're precariously balancing your pins, needles and notions on the arm of the sofa, only to knock them off, or they all fall down the side of the sofa? It's happened to me many times and is very frustrating, especially when pins disappear only to be found by annoyed family members days or weeks later!
I found a solution to this problem by designing the Sofa Sewing Station pattern. It fits neatly over the arm of the chair and has multiple pockets to keep the notions organised and close to hand. The nice thing is, you can decide how many pockets you want to create.
You could have up to six pockets if you wanted. It also has a built in pin cushion, so you can keep your needles and pins close to hand, and not lose them down the side of the sofa ever again!
For this Christmas version I've added some pretty red and white pom-pom trim to the pockets for an extra festive feel, and I've used the Christmas in the City fabric collection, gifted to me by Art Gallery Fabrics. I love the fusion of traditional meets modern with the retro decorations and pink blender print.
This pattern is suitable for confident beginners and would make a wonderful Christmas gift for any sewing lover. It's available now as a digital download, straight to your inbox. Stitching in front of the TV will be a breeze from now on!
If there's one thing I love it's the feel of sunshine on my face. So when the idea came to me to make a sun themed mug rug, I just knew I had to go with it!
The Rise and Shine Mug Rug is a FREE pattern for all newsletter subscribers; all you have to do is subscribe to my newsletter and you'll get the special code to use at the checkout to get the PDF digital pattern for FREE and straight to your inbox. There are at least 5 reasons why you should make one!
This project is a great skill builder. Have fun with patchwork and play with colour. You'll also learn now to create the suns rays, using the handy template included in the pattern.
The Rise and Shine Mug Rug features some simple embroidery and I show you a fun and easy way to stitch the wording onto your patchwork. With just one colour thread and only 2 types of stitch, you'll see how much fun embroidery can be.
Most of the pieces in this pattern are very small so it's an excellent time to raid your scraps! Use a combination of cute novelty prints, pastels and sunny brights. Put them all together into the patchwork and you'll be surprised how well they go together.
Extra points if your fabrics match your iron! I'm just loving my Oliso Pro-Plus smart iron that was gifted to me to try out.
There's nothing more satisfying than having a finish and this little project can be made in an afternoon. Make one for yourself or why not make one for a friend, and let them know they are a ray of sunshine in your life. They will think of you every morning when they look at it!
The Rise and Shine mug rug is a reminder to start each day shining brightly on the inside. Put your best foot forward, be positive and good things will come. Today is going to be a good day :-)
I hope you enjoy your FREE pattern! If you make one, please do share it on social media and use the tag #riseandshinemugrug and tag me @sarahashfordstudio so I can see your beautiful makes!
]]>
I love to slow down sometimes and work at a more leisurely pace with some hand stitching. Sitting with a cup of tea, and ideally a friend to chat to as well, is pretty much my idea of heaven.
So I came up with the idea to embellish some of my projects with hand stitching in a Kantha style, to add a wonderful textured quality. This is different to hand quilting in that there is no wadding/batting, and it is not holding layers together, it is purely for decorative purposes.
I thought I'd give it a go on my One Hour Gift Bag pattern. With all that hand stitching it was going to take me much longer than an hour to make the bag, but I was ok with that; process not product, right?!
Let me tell you how I did it.
I used a light weight interfacing on the front and back panels of the bag, ironing it on according to the manufacturers instructions. This gave the panels that little bit more body, making them easier to work with but without making them too heavy.
Then to the fun part, choosing colours to work the stitching with! My favourite thread for decorative hand stitching is 12 weight Aurifil Thread, and I used a combination of colours, including one variegated thread.
I drew lines onto the fabric with a hera marker at differing intervals, between 1/4" and 1/2"; I wanted the gaps to be different to give it an organic feel. A hera marker is a plastic tool to 'score' the fabric. If you don't have a hera marker, a chalk pencil or your removable marker of choice would also work well.
I then started in the middle of the bag at the left and did a running stitch all the way along. I cut enough thread to be able to sew two rows before I ran out of thread.
I carried on in this way, changing my thread colour every two rows, to add variation, and I didn't worry about being particular about which colour came next, I just went with it. I tied off the thread on the back each time. I then did exactly the same on the back panel.
Finally, I finished making the One Hour Gift Bag according to the pattern, which was surprisingly quick to do after all that hand stitching.
And ta-da! A beautiful gift bag complete with decorative hand stitching. The interfacing and stitching give it lots of body, which makes it feel really luxurious and special!
Even the back looks beautiful.
I hope you'll be inspired to give decorative hand stitching a go; you may just fall in love with the process as much as I have. You can find the One Hour Gift Bag pattern here, it's a great project to start with.
Oh, and isn't this fabric just stunning! It's called Hometown by Tilda.
I love to capture the essence of the seasons in my quilting. I thought I'd take the opportunity to share how to make this very simple but beautiful quilt block, the Maple Leaf Block, to hopefully inspire your Autumn makes. I've opted for golden, jewel like tones of amber and red, but you can choose whatever colours you like.
To Make a 12" (finished) Block You Will Need:
3 different colour fabrics, one for the leaf, one for the stem and one for the background.
Cutting:
Leaf - 2 squares 5" x 5", 3 squares 4 1/2" x 4 1/2"
Background - 2 squares 5" x 5", 1 square 4 1/2" x 4 1/2", 2 squares 4" x 4"
Stem - 1 square 4 1/2" x 4 1/2"
1. To make the stem, place a 4" red square right sides together on the bottom left corner of the 4 1/2" grey square. Draw a diagonal line from top left to bottom right on the 4" red square. Stitch down this drawn line.
2. Trim off the excess leaving a 1/4" seam allowance.
3. Press open. This is known as the stitch-and-flip method. Your square will look like this:
4. Rotate the square so that the grey part of the square is on the left. Place the second red 4" square right sides together in the bottom left hand corner, and mark in a diagonal line from top left to bottom right.
Stitch down the drawn line, as before, trim to a 1/4" seam, open out and press.
5) Place a 5" leaf square and a 5" background square right sides together and draw a diagonal line down the centre.
Stitch a 1/4" either side of this line. Repeat on the second pair of 5" leaf and background squares. Cut down the drawn line.
6) Open out and press to reveal 4 Half Square triangles. Trim each to 4 1/2".
7) Orientate all the squares as shown.
8) Stitch the squares together into rows, then stitch the rows together, nesting the seams to complete the block.
I hope you have fun making maple leaf blocks! You could make some gorgeous Autumnal cushions, or stitch lots of blocks to make a quilt to snuggle under by the fire as the evenings draw in.
This block is included in the sampler quilt that's on the cover of my book Jump into Patchwork and Quilting. Why not grab yourself a copy and learn some other new qulit blocks as well and put them all together to make your very own sampler quilt!
One thing I love about sewing and quilting is you could make the same thing 10 times over, each time in different fabrics and it would look completely different every time. So when I had the chance to play with the beautiful and whimsical Furrow collection by Leah Duncan for Cloud 9 fabrics, I just knew I wanted to make a new version of my Quick Stitch Needle Case Pattern. Autumn is here and stitching with this collection was just what I needed to embrace the changing of the season.
Stitching one of my own patterns that's already written is such a treat. I honestly couldn't believe how quickly it came together, and it was such fun. I want to keep it for myself but I know this will make the perfect gift for my sewing friends.
I thought I'd share a few top tips with you for this pattern, which actually apply to all small sewing projects!
1) Take care to get directional fabrics the right way up.
We've all done it. We start stitching or we go to open out the seam while ironing and bummer. The animal/flower/text/motif is upside-down. Never mind measure twice cut once, how about check and check again that everything is the right way up! It happens to the best of us. Thank goodness for seam rippers.
2) Measure Carefully when fussy cutting
For this Quick Stitch Needle Case I decided to fussy cut the adorable blue grasshopper for the centre. I had just one fat eighth of this fabric, and he was the only grasshopper on it. If I chopped him up by mistake, I was doomed. I made extra sure there was plenty of seam allowance before cutting in closer, to the right size. You could always mark the size out on your ruler with masking tape, or draw the cutting lines with chalk pencil first, especially if your favourite motif is one of a kind. You'll be glad you took the time to get it right.
3) Pressing Small Patchwork Pieces
Stitching with small pieces is really satisfying and effective, but there's nothing more annoying than when your mini patchwork block won't lie flat, even after excessive pressing. What you can do is immediately place an acrylic ruler on top after pressing, to trap the heat. Then add something heavy on top (such as a quilting book) and go and make a cup of tea. By the time you come back it will be nice and flat.
4) Sewing with Felt
The joy of sewing with felt is, it doesn't fray. You could, like me, use pinking shears to create a zig zag edge, but that's purely for decoration, felt won't fray when you cut it. Just make sure you increase your stitch length so that the needle can stitch more easily through the layers.
5) Close the Gap
Like many small projects, the Quick Stitch Needle Case has the need for a tiny bit of hand stitching to close the gap that was left for turning. I actually love this part of the process because I really enjoy hand stitching. I recommend using Aurifil 80 weight in Dove grey because this is a really fine thread that just melts into the stitching as you gently pull it tight. Dove is also my favourite thread colour because it blends with almost all colours, and is very gentle on the eye. You can find the Aurifil 5o weight thread for piecing and the Aurifil 80 weight thread for hand stitching, in my online shop.
I hope these little tips help give you a super finish on your Quick Stitch Needle Case and all your other small projects. Do share any of my pattern makes with me, I always love to see!
Writing a book is on many people's bucket lists. So when I was invited by C and T publishing to write a book aimed at beginner quilters, who are on their creative journey (after all that mask making in lockdown) it really was a dream come true.
What an honour and a pleasure it was to combine all the things I love; patchwork, quilting, writing and photography. Jump into Patchwork and Quilting quickly came to life in my mind, and it wasn't long before it was starting to come together on the page. Just a few short months later, and it is finally here!
I was so fortunate to have full creative control, and I designed 6 projects with the beginner quilter in mind, covering all the basic skills. The book includes 3 small projects and 3 quilts. They are;
*The Pretty Patchwork Pillow
*The Sleepy Moon Mug Rug
*The Tea and Treats Table Runner
*Making Waves baby quilt
*Log cabin throw quilt
*Cherished Sampler quilt
Each project uses a different technique so you can develop your skills and confidence as you work your way through the book. I have tried to include as many hints, tips and suggestions as I possibly can, so that you can quilt confidently and happily. These projects are meant to bring you joy!
I've also collaborated with my favourite thread company, Aurfil, creating a beginners thread collection to accompany the book.
There is a discount if you purchase the thread box and book BUNDLE in my shop.
I hope you love this book and the projects as much as I have enjoyed creating them for you! I can't wait to see your versions when you share them on social media. Nothing gives me more joy than seeing quilters stitch up one of my patterns, using fabrics that are special to them. Please be sure to tag me @sarahashfordstudio in your posts, I would love to connect with you.